
Bone Broth, Stock, or whatever
else you want to call it
I’ve always felt like this would be a somewhat useless post just because bone broth or stock (they’re generally the same exact thing) is truly almost as simple as pouring a bowl of cereal. Okay, maybe there’s a bit more to it than that, but it’s incredibly easy. Some of you seem to think it’s a bit elusive though, especially when it comes to getting that beautiful, jiggly gelatin.
This may not be what some of you want to hear, but I’m not going to give you an exact recipe. I’m going to share my method, and recommendations. This is because bone broth can and should be different almost every time you make it. There should be no pressure to procure the exact ingredients, but rather a more “catch all” kind of notion. Did you roast a chicken earlier in the week? Throw the carcass in a freezer bag and add any and all other bones and veggie scraps to that bag as you go, then bam, you have your ingredients for that week’s bone broth whenever it’s convenient to make it! Keep in mind, the main veggies you want to add (if you add any, we often do only bones) will always be your basic onion, celery, carrot and garlic mix. The amount of each can vary, just roughly equal amounts of each of the first, a couple of smashed cloves of garlic, a bay leaf, and a splash of apple cider vinegar. Again, you can do any of these, or none of them.
The other giant bonus to doing it this way is cost. If you’re using bones from bone-in cuts of meat and/or whole chickens, you basically have free bone broth. The veggies used are also extremely cheap. What’s more, I think the best and most flavorful cuts of meat come on the bone anyway! Chuck roast being one of my all time faves.
If you and your household don’t often have leftover bones, find a local farmer or a grocery store you trust and ask them for soup bones. They will be glad to have someone ask for the bits of the animal. Joint bones will have more collagen and gelatinous bits, so opt for those whenever possible! A whole chicken carcass will have a pretty ideal mix, but even more ideal is chicken feet..another bit butchers and farmer will happily sell too (they’re extremely cheap). I know chicken feet can seem pretty..off-putting, but I firmly believe that every bit of every animal can and should be put to good use. It may take a bit of getting used to, but people have been using animal feet to make nutrient dense broths since basically the dawn of time. I recommend boiling the feet for just a few minutes to rid them of any impurities, then roasting or broiling to get some caramelization, then start your stock. You can always skip the roasting process altogether, too.
A really easy way to start if a whole chicken or chicken feet feel intimidating, is to grab a pack of quality drumsticks or wings, roast them, pull the meat off to eat (or add into a soup later) then make your broth with those bones. Wings have lots of good gelatin in them!
If you’re not yet convinced you should be making and consuming bone broth, I’ll let my friend Travis Harris, a Functional Nutritional Therapy Practitioner, explain the benefits:
_________________
"Stock is a an amazingly rich source of protein and minerals. One of the greatest benefits of stock and bone broth is in the amino acid profile.
Glycine is incredibly anti-inflammatory. One of the main reasons chronic inflammation is so pervasive is that our modern diets are typically void of glycine-rich foods. Never before until recent history have we been able to just purchase pure muscle meat (steaks, skinless chicken, ground beef).
Most traditional meat dishes, from cultures all over the world, almost always make use of the bones, skin, and cartilage of the animal.
Glycine improves insulin sensitivity. A diet replete in glycine has also been shown to lower serum triglycerides. Because insulin resistance and inflammation contribute to a such wide range of chronic diseases, bone broth, stock, gelatin, collagen, and glycine can be amazing tools for healing. There’s a reason chicken soup is so culturally well known as a remedy for illness.”
You can visit his website here.
__________________
Okay, let’s get into my “method”.
First, I prefer roasted bones almost always. If you pulled the meat off of a roasted chicken or other bone-in roast, you’re good to go. Those bones have already been roasted. Roasting will caramelize bits and develop amazing flavor, and it’s a great way to go ahead and start breaking down more of the structure, making the nutrients that much more accessible when you make your broth.
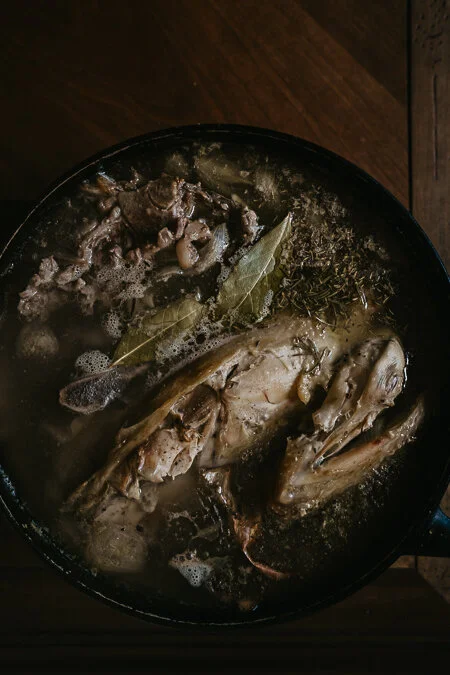
Add all the bones you want to use to a pot, making sure they aren’t mounded over the rim of the pot. Chop your veggies, if using, roughly in half or quarters and add. Onion skins can stay on, they add a bit of flavor and a beautiful caramel color. Toss in a couple of teaspoons of salt, some peppercorns, a bay leaf or two, and any other herbs you like. I like some rosemary, thyme and maybe some parsley stems. Cover everything with water (whatever water you’re comfortable drinking) and a splash of white wine and/or apple cider vinegar. These will both help extract nutrients and make calcium more available. Bring to a boil. Once boiling, reduce the heat down to low and let simmer for 8-24 hours. You want to slowly reduce the liquid by about a third, but if it seems to be reducing too quickly, add more water. The longer the better, but if you need some stock quicker, you can get away with 6-8ish hours.
Once your broth is done, strain it into jars and label and store! It’s nice to freeze some in ice cube trays for sauces as well.

This broth should set into a jiggly jello-y substance! If it doesn’t, that’s totally okay..it still is going to be incredibly good, just make a mental note for next time to either give it more time, or to make sure you have bones that have good connective tissues and collagen, like joints, feet, etc. That’s where the gelatinous broth comes from! When you’re eyeballing the ratio of water to bones, you want the bones to still be taking up quite a bit of the pot once you add water. Again, there’s no exact science, just use a lot of bones. That’s why I recommend saving them as you go. One chicken carcass will probably only need about 4 or so cups of water to cover, which will yield about 2ish cups of bone broth. You can make a more diluted bone broth, but you likely won’t get that jiggly, set broth.
When you go to use your broth, keep in mind that it is likely quite concentrated. For soups and stews, I often will dilute it a bit to make it go a bit further. You can think of it kind of like a concentrate.
Something else to keep in mind when starting your broth is its intended use. If it’s just for drinking or general use/you don’t know what you’ll use it for, keep it really neutral! If you’re going to use it for some kind of Asian dish, try some spices and herbs that go well with that like ginger, green onions, coconut aminos, anise, and rice vinegar. You get the gist. Be creative and experiment.
I hope this has been helpful! Remember, it’s not an exact science. Play around with it and know there’s no failing with bone broth! If it’s not as thick as you’d like one time, use more bones or less water the next time.